Prisming: How To Create Great Images With Prisms For Photography
The Ultimate Guide to Prism Photography
This blog post is an overview for our four part series explaining how photographers can use prisms (notably Fractals) to capture creative images.
We highly suggest reading each of the following posts in order to learn how to become a better prism photographer. Don't expect to shoot at your best without first understanding this information! Some of the facts you'll learn might surprise you (they sure surprised us 😲).
- Aperture: you're not optimizing your aperture for creating great prismed images. Here's what to do.
- Autofocus points: how this hidden camera setting can unleash your photographic potential.
- Lens choice: why the fixed-range 50mm lens (aka the "nifty fifty") might be the only lens you need for prisming.
Background
This project started for me in 2014 with a viral Kickstarter campaign. If you're curious, you can learn about that backstory here. Back then, prisming was a semi-blossoming concept, fueled by a few innovators in the photo industry. As the years progressed, word about the art has continued to spread and prisming has 'broken out'. Photographers and videographers at all skill levels are using Fractals to augment their subjects and create impressive photos in ways that were impossible to before.
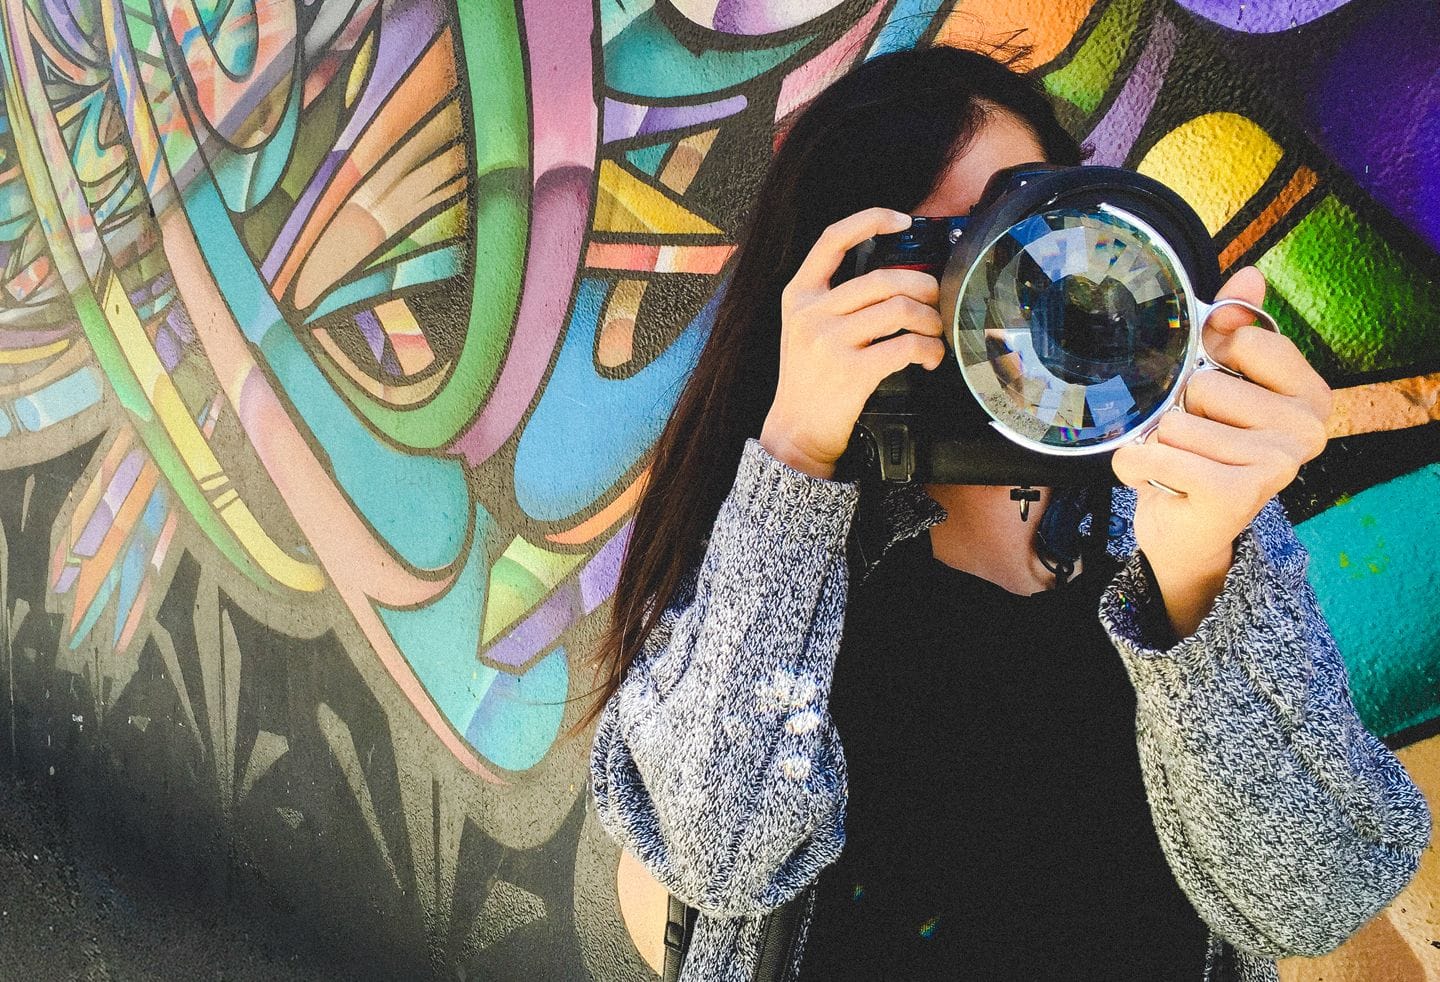
So what is prisming? Well, a photographer or videographer can take a prism—like, an equaliteral prism you'd find in a classroom, or a Fractal Filter and place it in front of their lens to bend light as it enters the lens. The results can be pretty stunning!
This effect was achieved simply by placing a glass prism in front of a camera lens. Neat, right? You're not the only one who thinks so. Prisming has caught on extremely quickly; with a 1200% increase in the use of the hashtag #prismphotography in the last four years.
So what makes prisms so special? Well, prisms are uniquely able to bend light, glares, and reflections before they enter a camera's lens. Prisming requires no photoshop or post editing, and often creates results that are more natural and impressive than their photo-manipulated counterparts.
Prisming also adds an incredible amount of versatility to a photographer's toolbelt. They're an incredibly natural extension of a lens's optical system—relying on the same properties of physics to manipulate light before it's recorded onto the camera's sensor. It's just glass, afterall. As an extension of your lens system, prisms give you an incredible amount of precision and creative control.
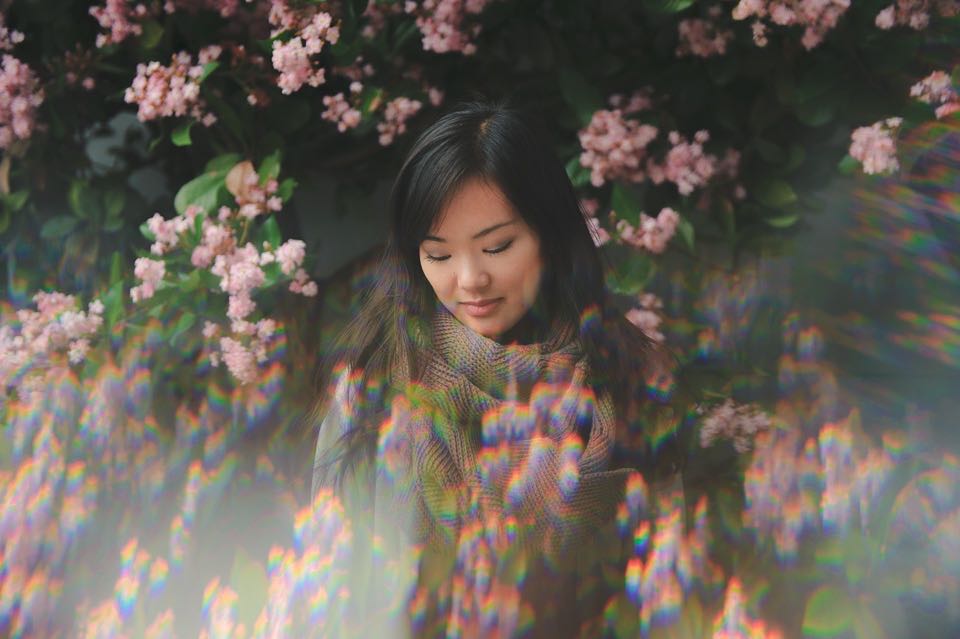
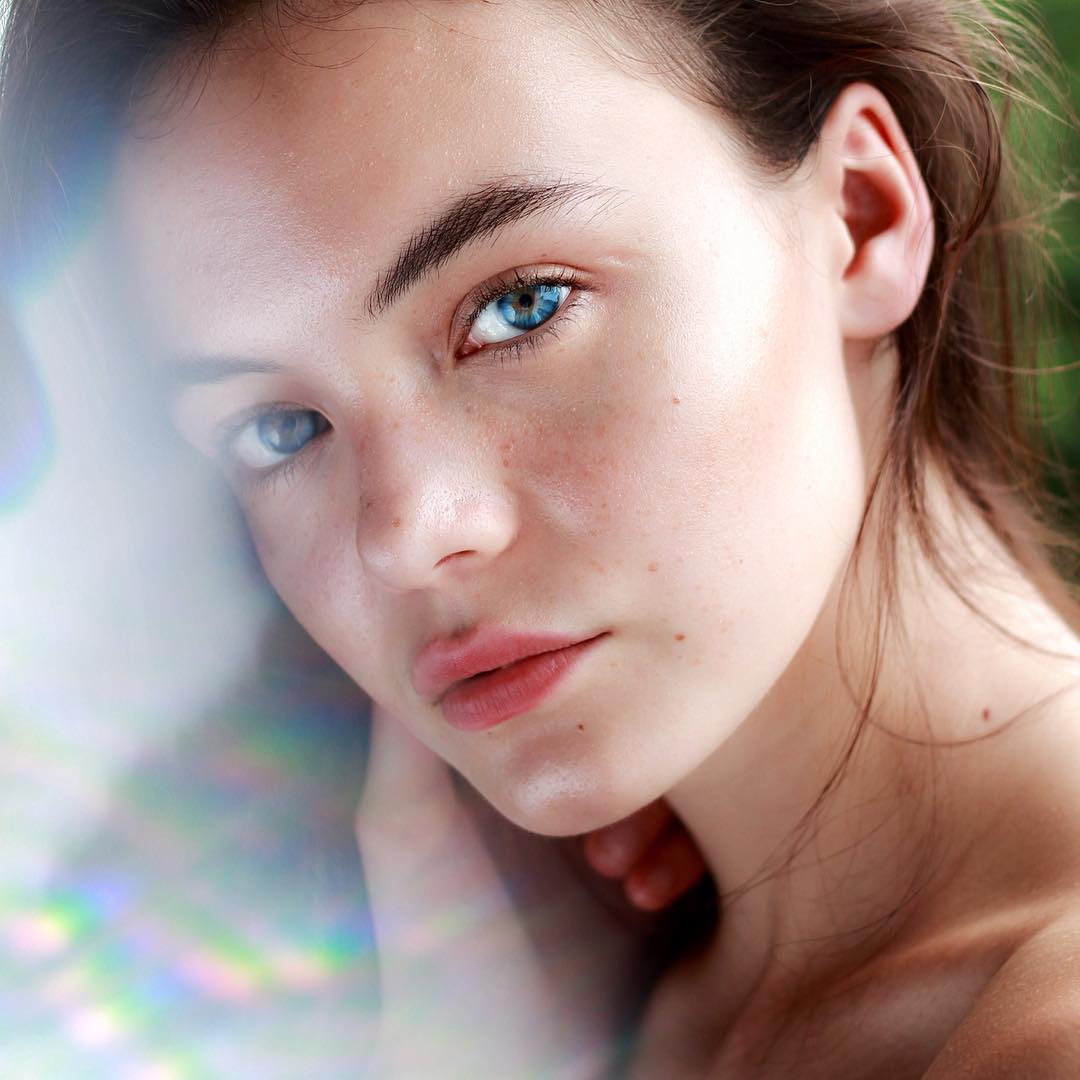
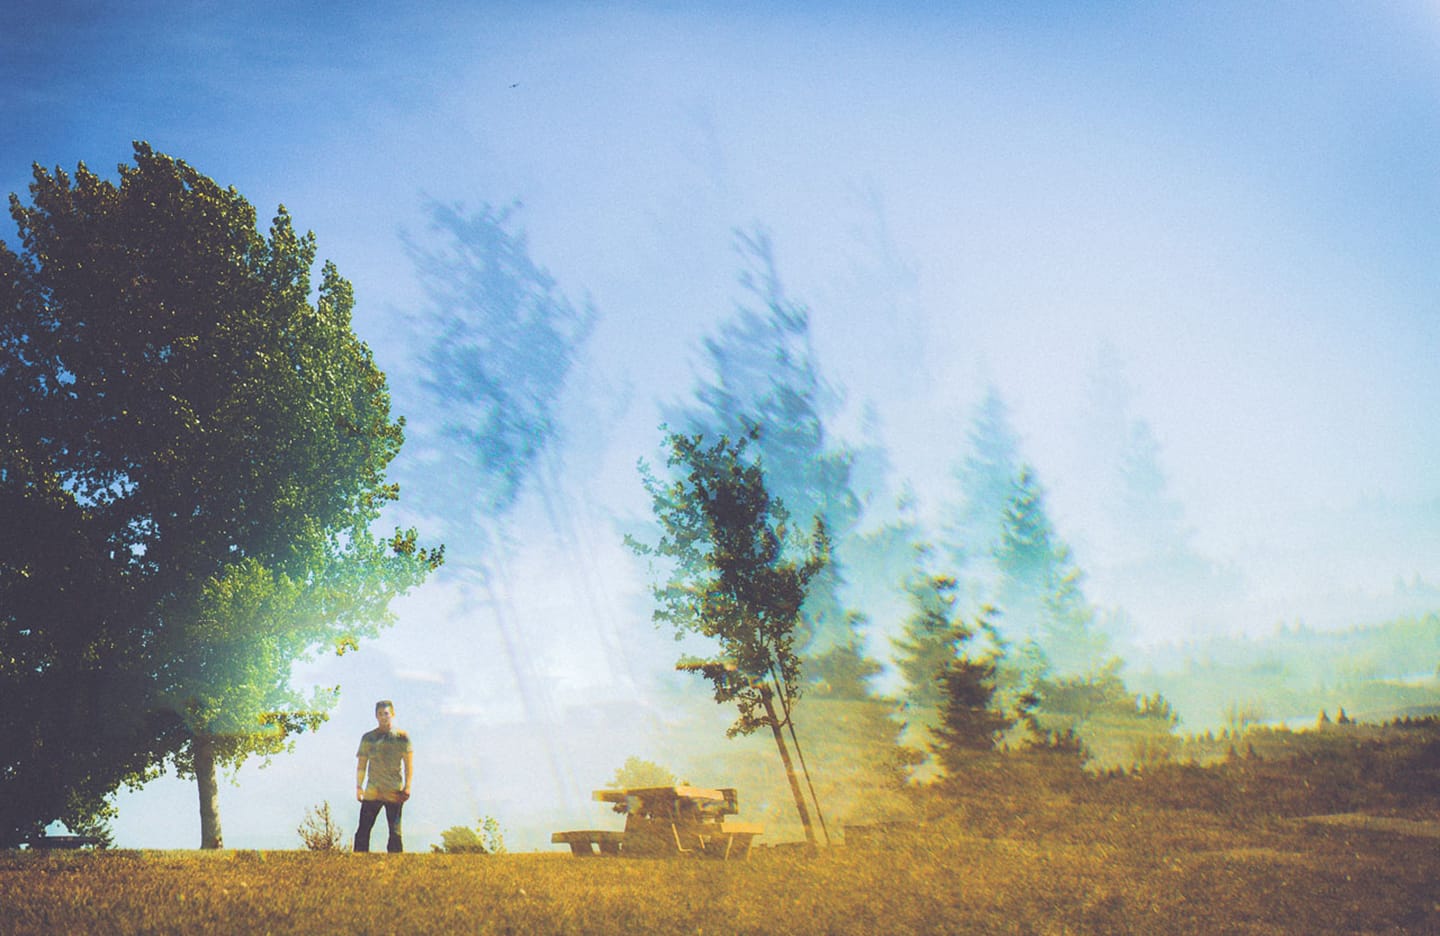
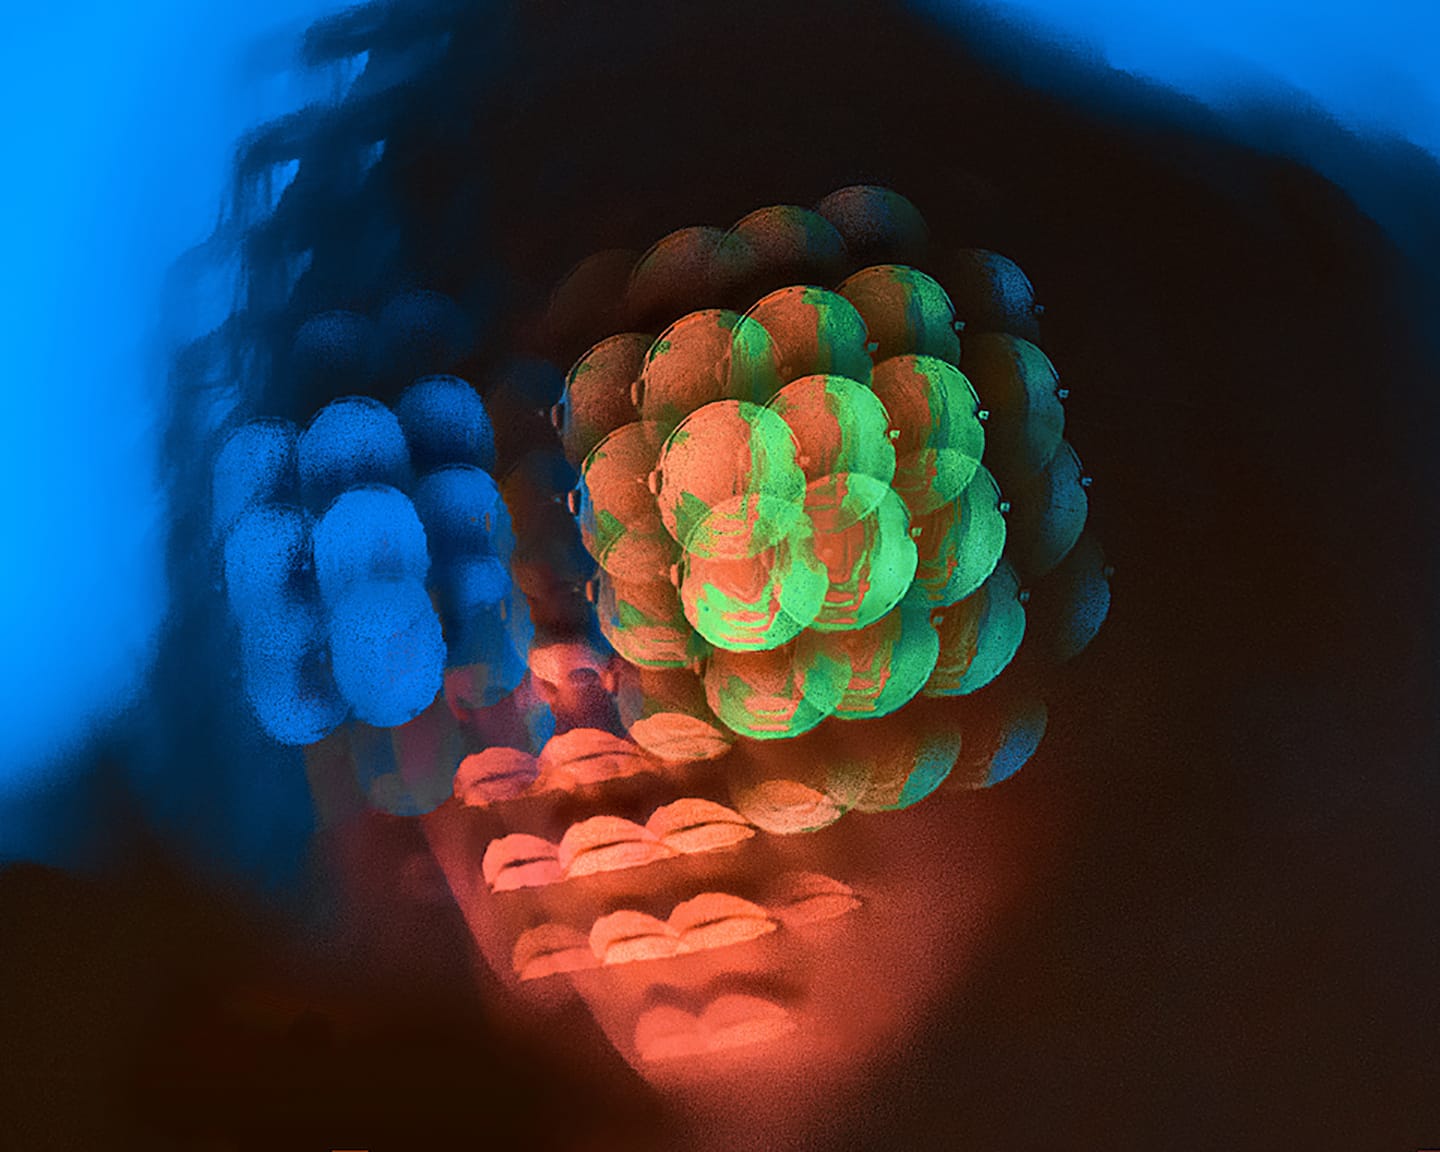
You can place your prism slightly in front of your lens to gently complement your subject or you can place the prism smack-dab in the middle of your lens to create a more abstract, mind-bending effect. The following images take advantage of the Classic set:

Prisms also excel in lacklustre environments or places with unfavorable lighting conditions, which often make it difficult for us to compose good shots. Placing your prism in front of your lens gives you the unique ability to quickly manipulate the light and subject matter in your compositions, allowing you to make boring situations extraordinary.
In the era of Instagram and mass-market DSLR adoption, prisming has also helped photographers further differentiate their style and technique from their competitors. I'm particularly attuned to the way Australian wedding photographer Ben Connolly has described the situation:
"Photography is getting more and more competitive. To stay on top of the heap, I need to continue developing my artistry with new styles and techniques. Prisming has added a stylistic flare to my images that keeps my clients impressed."
Versatility is key here, and prisms elicit a large amount of control. The prismatic, fractalized effects in the images referenced above were a subtle addition to the photographer's compositions, but we're also to create effects that are quite a bit more wild.
And that's what makes prisming great.
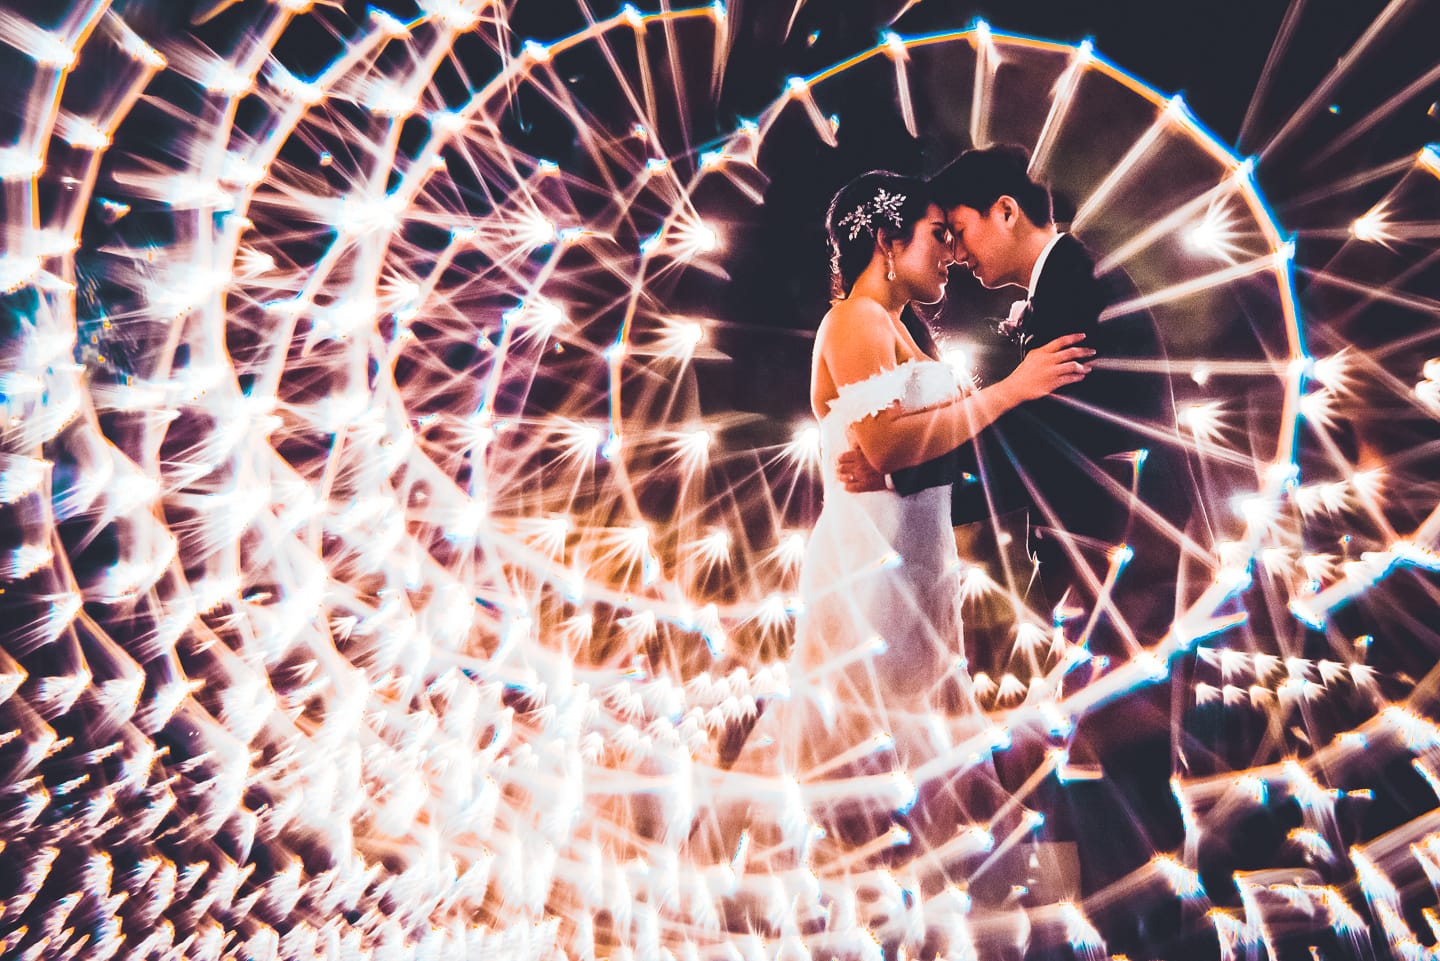

Yes, that was all done completely in camera, with no Photoshop or extra post processing required. The amount of time saved, right? Go take a walk, or binge watch another Netflix show. 🥳 OK, not yet, we still have a bit left to learn.
In summation, prisming is beautiful because:
-
The effects are created directly in camera, with no need for photoshop.
-
Photos taken with prisms (prism photos) are an easy way to amaze a client.
-
Prism photography creates effects which look natural to the eye.
Sound compelling? You're not the only one who thinks so. To me, there's nothing quite like it, and it's forever changed the way I shoot. 📷
Creativity at your convenience
Below you'll find a guide that's meant to teach novice prismers how to capture beautiful, fractalized images. Before we get there, there are a few more important facts that we need to convey so you can understand why prisms are really the most important technique to harness in your photographic toolkit.
Prism photography has the distinct advantage of being risk-free and highly convenient in a modern photographer's workflow. Stylistic, special purpose lenses such as tilt-shifts or those offered by Lensbaby create cool effects, but swapping lenses is an incredible burden during a portrait shoot, or, even worse—a wedding. Professional wedding photographers have a strong aversion against changing their lenses during a shoot, as the cost of missing a moment (a groom laughing? the wedded couple kissing?) mid-lense swap can be disastrous. ☠
Under this light, prisms really shine (pun.. intended.). Putting a prism in front of the lens takes only milliseconds—grab the prism from your pocket and move it in front of the lens. Bam, done, easy. Anticipate an important moment coming up and realize that you don't want it to be a prismed shot? Throw the prism aside in milliseconds, and shoot as you were. With special purpose lenses, you'd be out of luck. By the time you've changed your lens the moment has already passed.
Shooting is difficult as it is, and photographers need tools that make shooting less, not more, complex. The popularity of prisming in recent years will only continue to grow as photographers continue to search out for the techniques that are easy and don't bust us too far from a traditional workflow.
Prisming like a pro
Prisming isn't without it's difficulties. All advanced photography techniques come at a cost, and the cost associated with prisming is the investment in learning how to do it properly. You may not have been aware that the default settings that come stock with your camera are likely completely maladaptive to being able to create fractalized images successfully.
In our attempt to democratize the art of prisming, and unleash more creativity for all photographers, we've created the following guide. Expect the process of becoming calibrated correctly with your prisms to feel like something entirely new—requiring quite a bit of trial and error.
Do
Take off your lens hood
Get your prism as close to your lens as possible! This allows the prism itself to fall out of focus. Don't worry! It won't scratch the front element of your lens.
Use release priority
Shooting through glass can confuse your camera's focus settings and stop your shutter from releasing. Release priority gives you more control.
Use single-point AF
Shooting through glass can cause lots of varying focal planes to enter your lens. Pick the one you want to focus on with single point AF.
Shoot manual or aperture priority
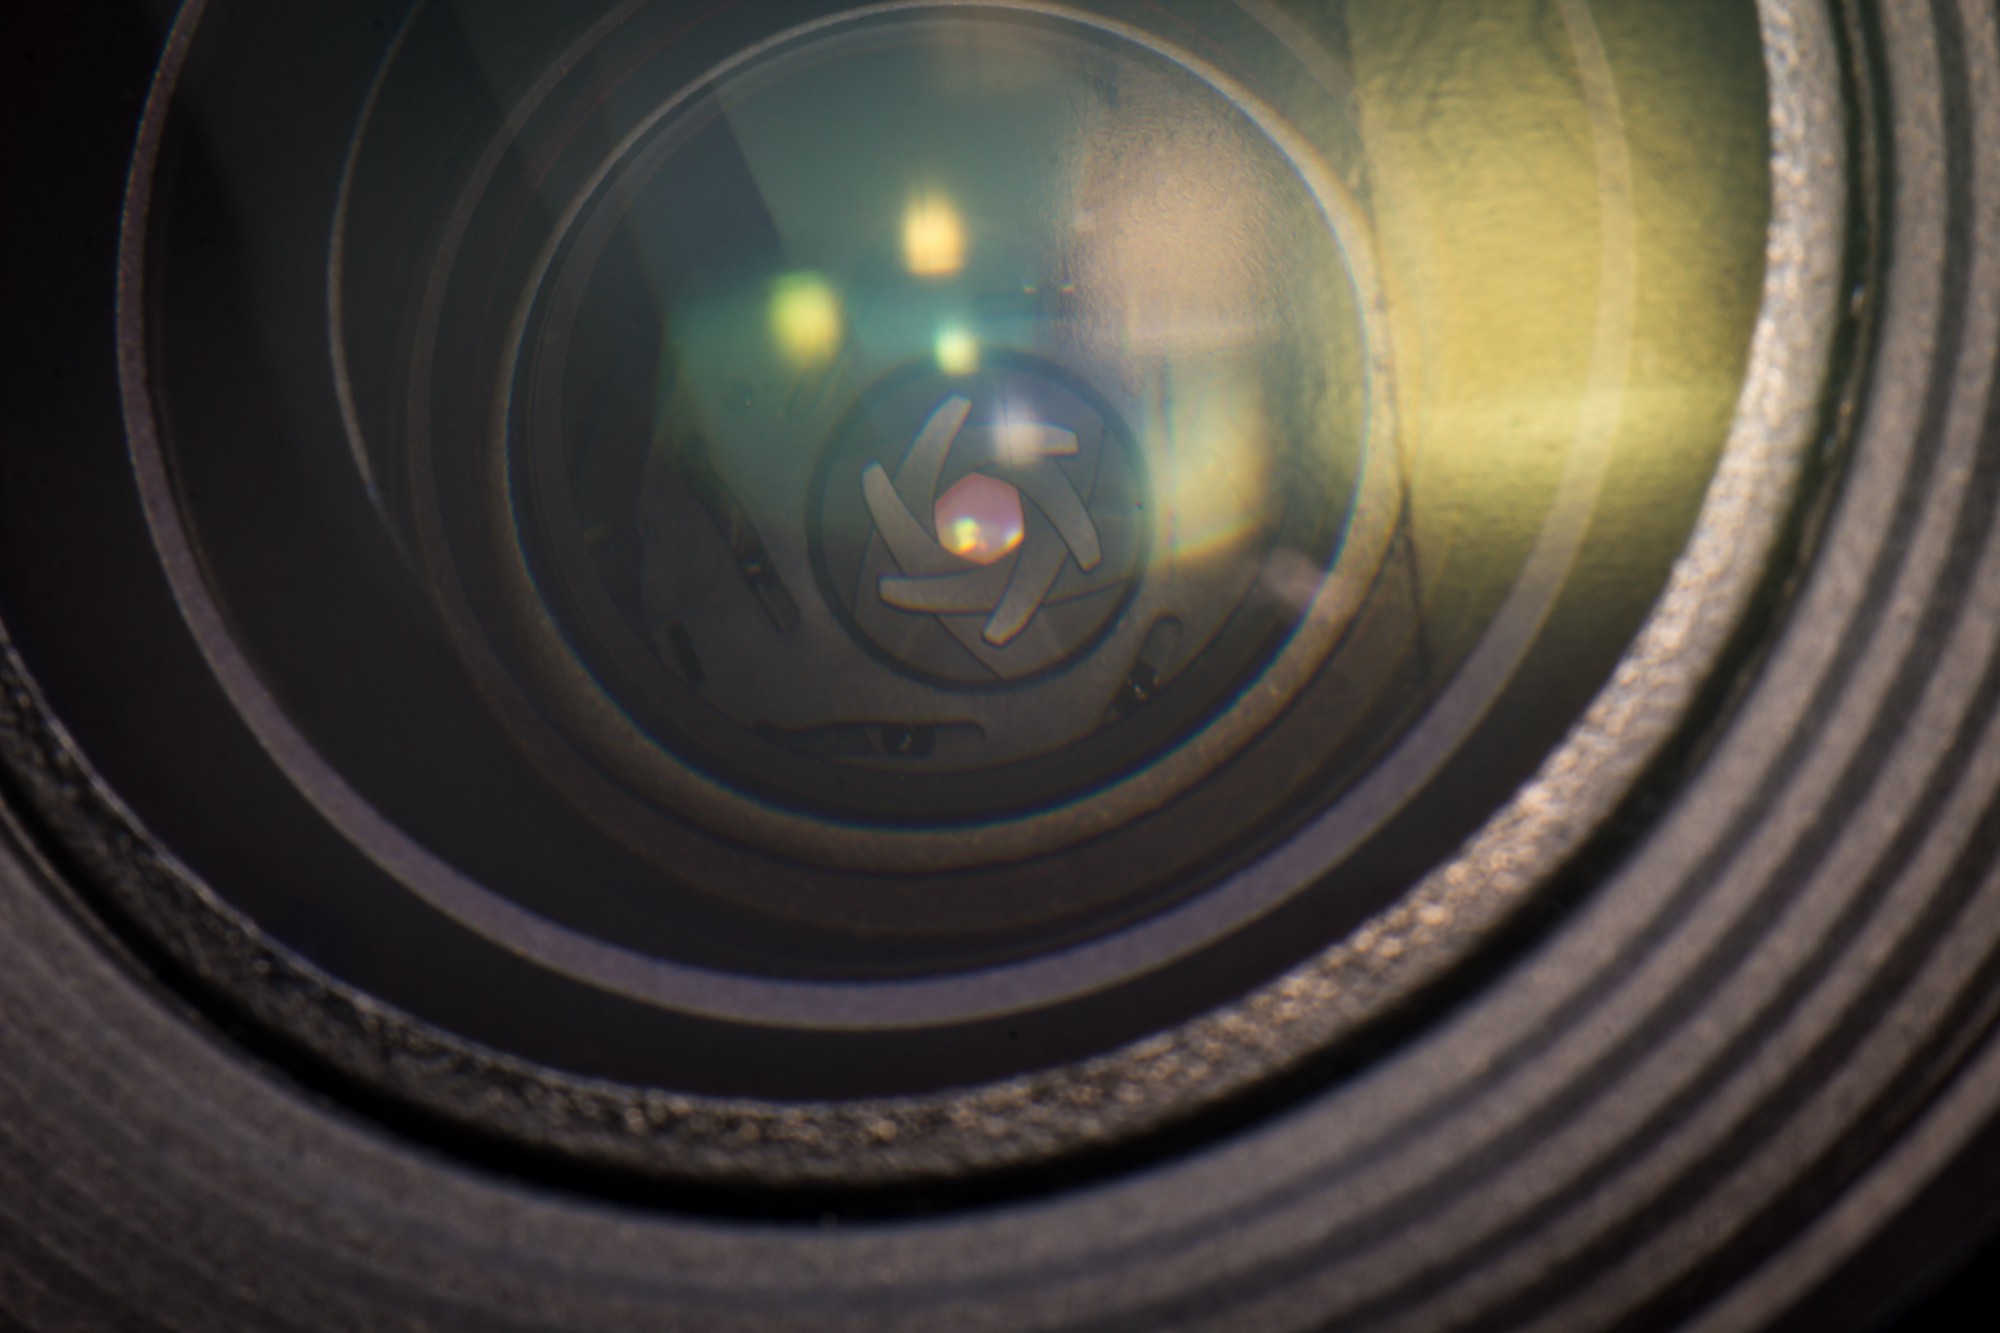
Above all, you want to have control over your aperture, keeping it (for the most part) wide. Use manual or aperture priority to achieve this.
Use your DoF preview button
If you're not shooting with a mirrorless camera, you must be using your DoF preview button to see what your field of view actually looks like at your current aperture. By default, the field of view you see is at your camera's largest aperture.
Don't
Don't be stiff
Make sure to wiggle around your prism like crazy! Try moving it and rotating it in every position relative to lens that you can think of for best results!
Don't use focus priority
Focus priority will wait for the camera to confirm the lens is in focus before taking an image. Helpful when shooting sports, but not here.
Don't use multiple-focus points
When you're prisming you'll have many different focal planes in your field of view. Multiple focus points won't know which to focus on.
Don't shoot automatic or shutter priority
These settings may cause your aperture to continuously change—which will give you unpredictable results, as prisming is heavily aperture dependent.
Don't forget about your DoF button
If you're not using a mirrorless camera, you must use your DoF preview button to preview your scene at your current aperture. Not doing so might lead to resulting images that don't look the same as those you previewed in your viewfinder! This isn't relevant to mirrorless cameras because the view displayed on their LCD is at the currently set aperture, not at the lens's widest.
Do
Use wide apertures
Wide apertures give a shallower depth of field, allowing you to focus more attention on your subjects and less on the glass in front of your camera.
Change your aperture regularly
Play with your camera settings rigorously. You'll notice f/1.4 and f/2.8 give greatly different results through prisms. Always be mindful of your aperture.
Don't
Don't exclusively use narrow apertures
Narrow apertures brings the glass in front of your camera into focus, which is not what we want. We want to see through the glass, not see the glass itself!
Don't ignore your aperture setting
One must experiment to learn—and if you shoot exclusively at one aperture, (or ignore it completely), you won't know which setting fits which situation.
Do
Use long focal lengths
Longer focal lengths will cause the images reflected off the prism to come harder into focus. I generally always shoot at 50mm or longer.
Use your prisms with artificial light
Artificial light is an absolute treat for prism photographers! When you find artificial light nearby, try to reflect it through the prism into your lens!
Don't
Don't exclusively use short focal lengths
Short focal lenghs will work in some situations, but in most cases, it will cause the prism in front of your camera to come too hard into focus.
Don't use your prisms with dull flat light
Shooting with prisms outside on cloudy days can make it difficult to find interesting subject matter to reflect from your prism into your lens.
I'll be periodically updating this guide as I gain more insight or as styles change. If you have any suggestions or other tips, please shoot me an email! If you're interested in prism photography, a popular Facebook group, Prism Photography has a bunch of photographers and videographers discussing and implementing cutting edge techniques. We also invite you to check our some of the amazing images that our community of specialized prism photographers have captured.
The Ultimate Guide to Prism Photography
This blog post is an overview for our four part series explaining how photographers can use prisms like Fractals to capture creative images.
We highly suggest reading each of the following posts in order to learn how to better fractalize your images. Don't expect to shoot at your best without first understanding this information! Some of the facts you'll learn might surprise you (they sure surprised us 😲).
-
Aperture: you're not optimizing your aperture for creating great prismed images. Here's what to do.
-

Autofocus points: why changing your focusing settings will improve your photography.
-
Lens choice: the fixed-range 50mm lens (aka the "nifty fifty") might be the only lens you need for prisming. Here's why.

Published by Nikk Wong
Nikk Wong is a photographer, probably very much like yourself. He began his career shooting weddings and portraits, but quickly became obsessed with prism photography. Now, he spends his time building lenses and products in an effort to bring the magic of prisming to a mainstream audience. (Can I stop talking about myself in third person now?) 🙃